-
+84 982 384 688 - Mr. Thi | +84 982 803 586- Ms. Hoa
-
theptangiabao@gmail.com
-
Thứ 2 - Thứ 7 | 07:30 - 17:00
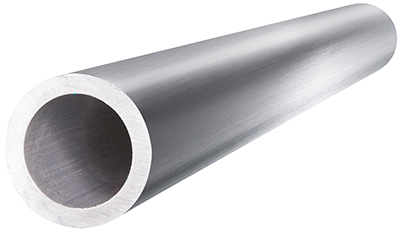
Seamless Tube Nickel chromium iron aluminium alloy B163 Grade UNS N06603

 Product info
| Supplier: | Tapgroup internation.,JSC |
| Address: | Số 32 Lô N4D, đường X2A, Yên Sở, Hoàng Mai, Hà Nội |
| Phone: | 0084 933 86 77 86 |
| Email: | info@tapgroup.vn |
| Website: | https://supplier-pipe-tube-ongthep.com |
| Insurance: | 12 tháng |
| Status: | Mới 100% |
| Origin: | China, Korea, Malaysia, Thailand, Japan, EU, G7 |
| Name: | Seamless Tube Nickel chromium iron aluminium alloy B163 Grade UNS N06603 | |||||||||||||||||||
| Type Of Tubes | Seamless Tube, Nickel chromium iron aluminium alloy B163 Grade UNS N06603 | SMLS Tube, Nickel chromium iron aluminium alloy B163 Grade UNS N06603 | ||||||||||||||||||
| Seamless Nickel and Nickel Alloy Condenser and Heat- Exchanger Tubes | ||||||||||||||||||||
| Scope | ||||||||||||||||||||
|
This specification covers seamless tubes of nickel and nickel alloys, as shown in Table 1, for use in condenser and heat-exchanger service. This specification covers outside diameter and average wall, or outside diameter and minimum wall tube. The sizes covered by this specification are 3 in. (76.2 mm) and under in outside diameter with minimum wall thicknesses of 0.148 in. (3.76 mm) and under, and with average wall thicknesses of 0.165 in. (4.19 mm) and under. Tube shall be furnished in the alloys and conditions as shown in Table 2. The values stated in inch-pound units are to be regarded as the standard. The values given in parentheses are for information only. The following safety hazards caveat pertains only to the test method portion, Section 12, of this specification. This standard does not purport to address all of the safety concerns, if any, associated with its use. It is the responsibility of the user of this standard to establish appropriate safety and health practices and determine the applicability of regulatory limitations prior to use. |
||||||||||||||||||||
| Workmanship, Finish, and Appearance | ||||||||||||||||||||
|
The material shall be uniform in quality and temper, smooth, commercially straight, and free of injurious imperfections. |
||||||||||||||||||||
| Dimensions and Permissible Variations | ||||||||||||||||||||
|
Outside Diameter and Wall Thickness — The permissible variations in the outside diameter and wall thickness of tube shall not exceed those prescribed, as applicable. Length — When tube is ordered cut-to-length, the length shall not be less than that specified, but a variation of plus 1⁄8 in. (3.2 mm) will be permitted, except that for lengths over 30 ft (9.1 m), a variation of plus 1⁄4 in. (6.4 mm) will be permitted. Straightness — Material shall be reasonably straight and free of bends or kinks. |
||||||||||||||||||||
| Number of Tests | ||||||||||||||||||||
|
Chemical Analysis — One test per lot. Mechanical Properties — One test per lot. Hardness — A representative sample consisting of 3% of each lot of tubes with annealed ends Grain Size — One test per lot. Flare — One end of each random length tube |
||||||||||||||||||||
| Mechanical Properties and Other Requirements | ||||||||||||||||||||
|
Mechanical Properties — The material shall conform to the mechanical properties specified in Table 3. Hardness — When annealed ends are specified for tubing in the stress-relieved condition, the hardness of the ends after annealing shall not exceed the values specified. Flare — A flare test shall be made on one end of each random length tube after final heat treatment. In the case of stress-relieved tubing with annealed ends, the test shall be made prior to, or subsequent to, annealing of the ends, at the option of the manufacturer. The flare test shall consist of flaring a test specimen with an expanding tool having an included angle of 60° until the specified outside diameter has been increased by 30%. The flared specimen shall not exhibit cracking through the wall. Grain Size — A transverse sample representing full-wall thickness of annealed alloys UNS N08120, UNS N08810, and UNS N08811 shall conform to anaverage grain size of ASTM No. 5 or coarser. Hydrostatic Test: Each tube with an outside diameter 1⁄8 in. (3.2 mm) and larger and tubes with wall thickness of 0.015 in. (0.38 mm) and over shall be tested by the manufacturer to an internal hydrostatic pressure of 1,000 psi (6.9 MPa) provided that the fiber stress calculated in accordance with the following equation does not exceed the allowable fiber stress, S, indicated below. The tube shall show no evidence of leakage. P = 2St/D where: P = hydrostatic test pressure, psi (MPa), S = allowable fiber stress for material in the condition furnished, as follows: t = minimum wall thickness, in. (mm); equal to the specified average wall minus the permissible “minus” wall tolerance, Table 4, or the specified minimum wall thickness, and D = outside diameter of the tube, in. (mm). When so agreed upon between the manufacturer and the purchaser, tube may be tested to 11⁄2 times the above allowable fiber stress. When stress-relieved tubes with annealed ends are to be tested hydrostatically, such pressure testing shall be done prior to annealing of the ends of the tube. |
||||||||||||||||||||
| Alloy | psi | Mpa | ||||||||||||||||||
| Annealed nickel-chromium-iron-aluminum alloy UNS N06603 | 24 000 | 165.00 | ||||||||||||||||||
| Chemical Requirements | ||||||||||||||||||||
| Composition, % | ||||||||||||||||||||
| Alloy | Nickel | Copper | Molyb-denum | Iron | Manganese, Max | Carbon | Silicon | Sulfur, Max | Chromium | Aluminum | Titanium | Phosphorus | Cerium | Zirconium | Yttrium | Boron | Cobalt | Columbium (Nb) | Tungsten | Nitrogen |
| Nickel chromium iron aluminium alloy UNS N06603 | BalanceB | 0.5 max | … | 8.0 to 11.0 | 15.00 | 0.20 to 0.40 | 0.5 max | 0.01 | 24.0 to 26.0 | 2.4 to 3.0 | 0.01 to 0.25 | 0.020 max | … | 0.01 to 0.10 | 0.01 to 0.15 | … | … | … | … | … |
| AMaximum unless range is given | ||||||||||||||||||||
| BElement shall be determined arithmetically by difference | ||||||||||||||||||||
| CAlloy UNS N08811: Al + Ti, 0.85-1.20 | ||||||||||||||||||||
| Mechanical properties of tubes | ||||||||||||||||||||
| Materials and condition | Tensile strength, Min, ksi (Mpa) | Yield strength (0.2% Offset), Min, psi (Mpa) | Elongation in 2 in. or 50mm (or 4D) min., % | Rockwell hardness (or equipvalent) for annealed endsA | ||||||||||||||||
| Annealed Alloy UNS N06603 | 94 (650) | 43 (300) | 25 | … | ||||||||||||||||
| Low-Carbon Nickel-Chromium- Molybdenum-Tungsten Alloy: | ||||||||||||||||||||
| ARockwell or equivalent hardness values apply only to the annealed ends of stress-relieved tubing. Caution should be observed in using the Rockwell test on thin material, as the results may be affected by the thickness of specimen. For thickness under 0.050 in. (1.27 mm) the use of the Rockwell superficial or the Vickers hardness test is suggested. For hardness conversions for nickel and high-nickel alloys. | ||||||||||||||||||||

Mr. Thi
 Email:
theptangiabao@gmail.com
|
 Skype:
|
 Hotline/ Zalo/ Wechat:
+84 982 384 688
|

Ms. Hoa
 Email:
theptangiabao@gmail.com
|
 Skype:
|
 Hotline/ Zalo/ Wechat:
+84 982 803 586
|

Ms. Phương
 Email:
theptangiabao@gmail.com
|
 Skype:
|
 Hotline/ Zalo/ Wechat:
+84 971 567 341
|

Ms. Trinh
 Email:
theptangiabao@gmail.com
|
 Skype:
|
 Hotline/ Zalo/ Wechat:
+84 971 567 943
|

Ms. Trân
 Email:
theptangiabao@gmail.com
|
 Skype:
|
 Hotline/ Zalo/ Wechat:
+84 971 567 954
|


 Home
Home


